Insulin Pumps & Air Bubbles: you don't have to put up with them!
Michelle MacPhee
D-Mom & Creator/Co-Founder of Waltzing the Dragon
Got air bubble troubles? Our family, too, has had the frustration of high blood glucose because of air in our son's insulin pump tubing getting in the way of the pump doing its job. We’ve tried a bunch of different strategies and share them with you here so you can crush those bubble troubles!
In talking with PWD who wear an insulin pump, or parents of children who use an insulin pump, when the topic of air bubbles in pump tubing comes up we hear one of two responses:
“Air bubbles? Hmm… We’ve never had that problem.” OR
“Air Bubbles?! They make me want to smash the pump into itsy bitsy pieces and then hurl it all out the closest window!”
Whichever camp you belong to, don’t worry: we can identify! One of us (Danielle) has had the first experience, and the other (Michelle), the second. And although there were moments (days, weeks) of intense frustration, having applied the advice gathered from our son’s diabetes health care team, from our insulin pump company, and through other families, I can now say that we no longer experience more than the occasional, minor trouble with air bubbles. And all of the windows in our home remain intact.
Here are some tips and tricks for you to try:
When Filling a New Pump Reservoir with Insulin:
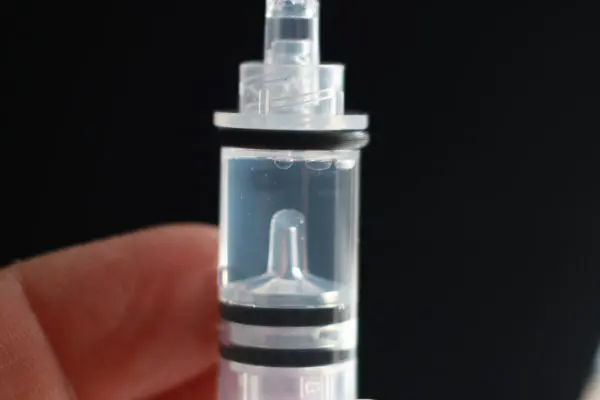
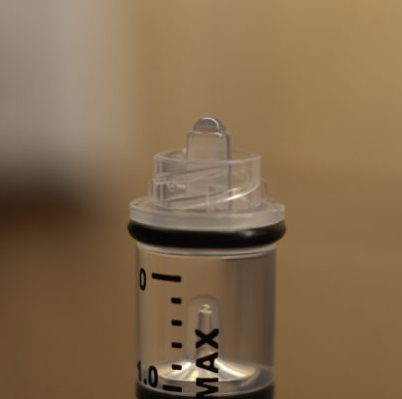
- Draw the insulin slowly into the pump reservoir. If you pull too quickly on the plunger, air in the neck of the reservoir may be pulled into the body of the reservoir along with the insulin.
- After filling the reservoir and attaching the tubing, leave the filled reservoir standing up on the counter for several minutes to a half-hour before loading it into the insulin pump. This will give time for the bubbles to rise to top. Sometimes we wind the tubing around a cupboard knob so bubbles in the tubing rise as it hangs there.
- Tap out any air bubbles before loading the reservoir into the pump, by using a pen, or flicking the side of the reservoir with your finger. Tilt and turn the reservoir as you tap, so that bubbles can escape from all angles and out from under the rim.

SHARE THIS ARTICLE
- It may help to fill the pump reservoir in stages:
First fill it 25% full, then, leaving the filling-syringe in the insulin bottle, bring to the top existing air bubbles by whacking it with a pen (a big, fat Sharpie seems to do the job). Next purge the bubbles from the reservoir by pushing some insulin (along with the bubbles) back into the vial. Then fill fully, or up to your desired level, and purge the bubbles out as above. (You can create more stages if necessary by filling to 50% and repeating the purging process; then to 75% and finally to 100%.
Tips from the Trenches
In both of our homes, we find it works to fill in 2 stages: we fill it to 25% (when the large air bubble in the neck of the cartridge/reservoir is sucked completely into the cartridge/reservoir), then push the air (along with some insulin) back into the insulin vial. Then we fill to 100%, skipping the middle two stages. At the desired fill level, we tap out any visible bubbles, push a bit back into the insulin vial, and then remove the filling-syringe. ~Michelle and Danielle

- Before connecting the tubing, ensure there is a heaping drop of insulin at the top of the cartridge/reservoir opening.
- Try using room temperature insulin. Cold insulin may be more likely to form air bubbles as it warms up. Allowing any air bubbles to collect before loading and wearing the insulin pump may alleviate the problem.
If you store in the fridge the bottle of insulin currently being used, try leaving the vial out of the fridge for a couple of hours before filling the insulin pump cartridge/reservoir). Or you can fill the cartridge with insulin straight from the fridge but then leave the filled cartridge out for a few hours before loading it into the insulin pump. Then, before loading the cartridge and/or before priming the tubing, tap out any bubbles that may have formed inside the cartridge by tapping the side of the cartridge with a pen.
Tips from the Trenches
We always fill with cold insulin, with no problems. I have also spoken to other insulin pump wearers / parents of insulin pump wearers who report that the temperature of the insulin makes no difference for them; they fill cartridges/reservoirs straight from the fridge without experiencing air bubble trouble. ~Danielle
- Beware of too much air in the insulin vial.
(The following applies ONLY to the use of insulin VIALS; it does NOT apply to the use of insulin PEN FILL CARTRIDGES.)
The common advice before drawing insulin out of its original vial is to inject an equal amount of air into the vial, to equalize pressure inside and outside the vial. If this is working for you: great, keep doing what works.
But if you are having trouble with air bubbles, too much air in the insulin vial could be part of the problem. How do you know if there is too much in the insulin vial? When filling a insulin pump cartridge/reservoir or syringe, you should have to pull the plunger back; it should not be pushing out on its own – if it is, this may mean the air pressure inside of the insulin bottle is too high. You could try:
a. Injecting only half as much air into the vial as you are taking out. This will prevent the insulin from becoming super-saturated with air. (If you are midway through a vial now, first decrease air pressure inside the vial by drawing off a syringe-full of air before doing this.)
b. Injecting air into the vial only when it is in an upright position. This will ensure that air is injected into the air space in the vial and not into the insulin.
(WARNING: The above tip does NOT apply if you use pen-fill cartridges of insulin – they equalize pressure on their own. So if you use pen cartridges, DO NOT INJECT AIR into the INSULIN CARTRIDGE – this could blow out the end of the cartridge and spray insulin everywhere!)
- Cycle the Reservoir Plunger Correctly:
The instructions for the insulin pump cartridge/reservoir may tell you to cycle it (push the plunger in and out) before filling the reservoir with insulin. In some insulin pump models, cycling the plunger distributes a lubricant which makes it easier for the plunger to move (thus minimizing the risk of an obstruction and the associated alarm). Over-cycling of the plunger may diminish that lubricant, creating problems for the effective functioning of the cartridge/reservoir. Check with your insulin pump company for recommendations specific to your device.
Tips from the Trenches
Some pump users report success with cycling the cartridge/reservoir only 1 time before filling it (pull plunger to draw air into the cartridge/reservoir, then push it back in once to inject that air into the insulin vial, or to simply expel the air). The Animas cartridge instructions recommend cycling the cartridge 2-3 times, taking care not to over-cycle the cartridge. That seems to be working for us. ~Michelle
- Try holding the clear plunger (not the reservoir) when removing the plunger attachment. Twisting the plunger or moving it from side-to-side may draw air back into the cartridge.
- It’s best to attach the tubing connector to the insulin pump cartridge/reservoir finger-tight and then twist an additional quarter turn. Do not over-tighten the tubing connection, which could crack the plastic at the connection. You will know that you have over-tightened if it feels “stripped” (keeps turning, never establishing a snug connection).
- Try knocking with your knuckles on the side of the insulin pump, or tapping the corner of the insulin pump gently on the counter while loading the reservoir and priming. This will encourage any bubbles up to the neck of the insulin pump reservoir and then out the tubing.
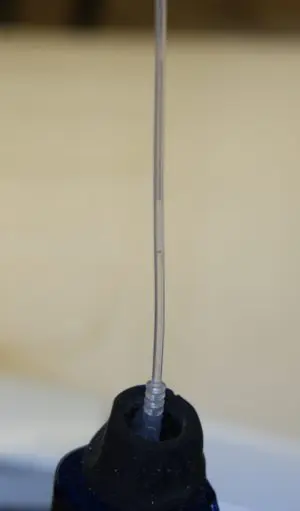
- After loading and priming, check the tubing for air bubbles. If any remain, you can purge them by tapping and priming.
Between Set Changes:
- Check the tubing daily for air gaps.
Find a time in your daily routine to build in a quick check. Before bed may be a good time, as your child will likely be monitored less during the night than during the day, so air gaps may go unnoticed for longer overnight. Right before you give a bolus may be another good time to check. If you find air bubbles, you may disconnect the tubing from the infusion set and then tap/prime until the air bubbles are gone.
- If you think there may be air bubbles in the reservoir, you could disconnect and then remove the reservoir from the insulin pump to check. If you find air bubbles, you could either tap and purge them, or discard the cartridge/reservoir and tubing, replacing with a new set.
- Any time you disconnect the tubing from the insulin pump, re-prime or re-load before reconnecting.

Other Tips:
- When you change out a “troublesome” reservoir, it’s advisable to check for any visible cracks in the seal or plunger.
- You could try pump reservoirs and infusion sets from different lot numbers to see if that makes a difference.
- Trying a fresh vial of insulin may help. If insulin was previously exposed to extreme cold or heat this could cause air bubble problems.
- If you buy your insulin in vials, you could try pen-fill cartridges; if you use pen-fill cartridges, you could try vials. Vials and pen-fill cartridges have different mechanisms for equalizing air pressure; this difference may make a difference for you.
- It’s useful to write down the details any time you have air bubble trouble: date, time; activities; any bumps or tugs that occurred; any climate changes that occurred (in summer, did you go from extreme heat to air-conditioned room); the cartridge/reservoir batch number; the insulin vial used and/or lot number. This may help you find trends in troublesome conditions.
- Consider contacting your insulin pump company when you have an episode of air bubble trouble. They are there to help you trouble-shoot. Also, doing so will create a service record should your insulin pump need to be replaced at some point.
- You may want to talk to your/your child’s doctor about the brand of insulin you use. It may be worth trying a different brand of fast-acting insulin to see if that makes a difference for your family.
Tips from the Trenches
Many of the strategies listed here made some difference for us – but when we switched to NovoRapid (with a different infusion set than our usual), our air bubble trouble disappeared instantly. For us, switching insulin brands has made the biggest difference. Conversely, Danielle’s son uses the same insulin brand that we switched FROM, and yet they have never had trouble with air in the tubing.
On a related note, we have tried diluted (U-50) insulin, and full-strength U-100; this made no discernible difference to us.
~Michelle
- You could try a different type or brand of infusion set.
Tips from the Trenches
We have tried different infusion sets, including Contact-Detach™, Accuchek Rapid-D™, Orbit Micro™, Cleo, Inset II, and Inset 30 – in terms of air bubbles, this hasn’t seemed to impact our troubles. However, we are having great success currently with Quick-set. Is that because of the infusion set alone? The insulin brand alone? The combination of infusion set and insulin brand? Or is it a complete fluke that we no longer struggle with air bubble trouble? We haven’t experimented with the variables enough to comment what actually caused the change, but given our current success, we don’t want to upset the apple cart to find out! ~Michelle
- Don’t struggle alone!
Talk to your/your child’s diabetes health care team (nurses and doctor), your insulin pump company, and other insulin pump users. There are solutions out there; the more people you consult (one at a time), the more likely you are to find that tip that makes a difference for you and your family. All the best!
Tip from the Trenches
The worst part about our air bubble trouble was feeling like we just had to figure it out on our own. After months of trying to deal with it alone, we finally resolved it when we talked to others in the community.
-Michelle
The above information was reviewed for content accuracy by clinical staff of the Alberta Children’s Hospital Diabetes Clinic.
SHARE THIS ARTICLE