Preparing Insulin for Injection by syringe
Let's take a look at best practice for preparing a dose of insulin using syringes, including how to draw a single type, as well as how to mix clear and cloudy. We also look at the difference between vials & cartridges and how to draw insulin from each, including a reminder of when to add insulin to the container, and when you don't need to. All you need to know for either an Multiple Daily Injection or an N/NPH program!
Getting Ready
Wash your hands with soap and water.
Gather supplies:
Check the expiry date of each cartridge of insulin.
Disinfection of the injection site (using alcohol swabs, for example) is usually not required, according to FIT Canada Recommendations for Best Practice in Injection Techniques. However, if alcohol swabs are used to clean the site, let dry completely before injecting.
Vial or Cartridge... What’s the Difference?
Insulin is “bottled” in 2 different types of containers: vials are small, relatively “stout”, and contain 1000 units of insulin; cartridges are designed for use in insulin pens - they are slimmer, smaller, and contain less insulin at 300 units.
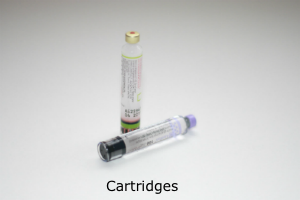
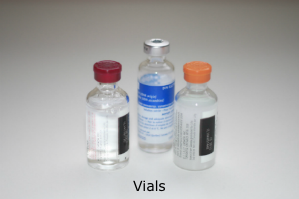
When using an insulin pen, the cartridge is loaded (or may come pre-loaded) into the pen so there is no need to draw insulin before each injection.
When using a syringe, you can draw insulin from either type of container – the insulin itself is the same in every way, including concentration, it’s just the bottle that is different. This difference in bottle design means a slight difference in process when drawing insulin: vials require you to inject air into the vial before withdrawing insulin (to equalize air pressure); while cartridges, conversely, have a moving rubber end cap, so air is NOT injected into the cartridge before withdrawing insulin.
Young children are often on very small doses of insulin, consuming less than 300 units within the 28-day viability period after opening. Since cartridges contain less insulin, some families prefer to use cartridges over vials, as they reduce insulin waste (less to throw out, if any, when the 28 days are up).
Drawing ONE type of insulin into a Syringe:
In a Basal-Bolus Program with Multiple Daily Injections (MDI), the rapid-acting insulin and long-acting insulin is drawn and injected in separate syringes. Also, within a Conventional Insulin Program sometimes an insulin dose contains only rapid-acting insulin (at supper time, for example), or only N/NPH (at bedtime, for example).
1. Draw the insulin.
If using a vial:
If using a cartridge:
2. Give the insulin dose right after preparing it.
3. If it is meal-time and you are administering both types of insulin (Lantus® and rapid-acting insulin), repeat steps 1 & 2 for the second type of insulin.
Mixing TWO types of Insulin (Clear and Cloudy) in a Syringe:
In a Conventional Insulin Program, sometimes (breakfast dose, for example) the “Cloudy” intermediate-acting insulin (N/NPH) is combined with the “Clear” rapid-acting insulin in a single syringe, to reduce the number of injections. The process differs slightly based on whether insulin is drawn from a cartridge or a vial:
A. Drawing from Insulin Cartridges
1. Draw the clear insulin first. Hold the cartridge upside down and insert the needle. Pull the plunger back to the right dose. If there are air bubbles, tap the syringe and/or push the entire dose back into the cartridge until all air bubbles are gone.
2. Mix the cloudy insulin very well:
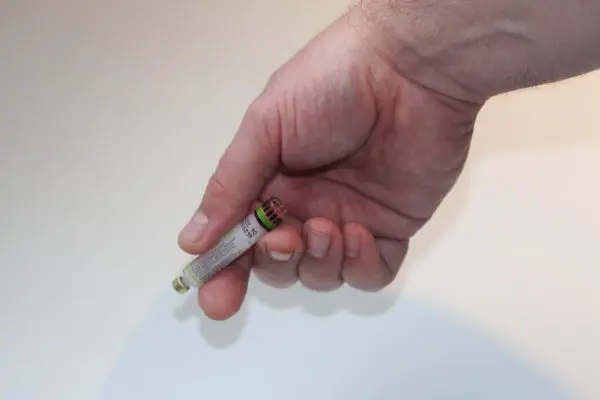
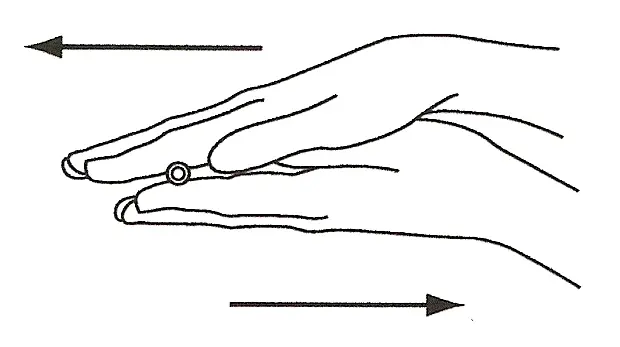
a. Roll 10 Times: roll the bottle between the palms of your hands 10 times:
1. Draw the clear insulin first.
Hold the cartridge upside down and insert the needle. Pull the plunger back to the right dose. If there are air bubbles, tap the syringe and/or push the entire dose back into the cartridge until all air bubbles are gone.
2. Mix the cloudy insulin very well:
a. Roll 10 Times: roll the bottle between the palms of your hands 10 times:
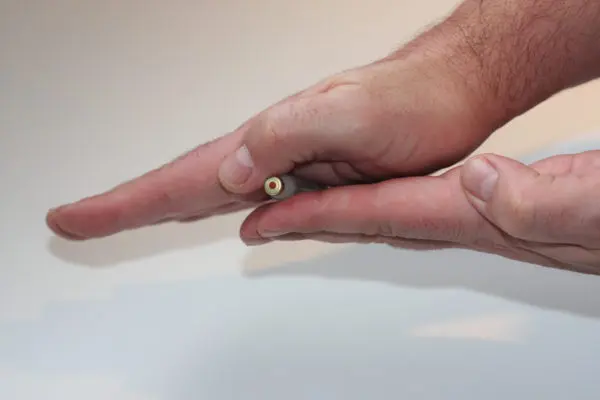
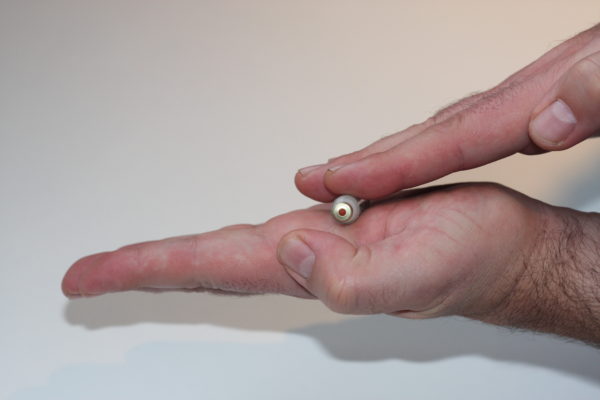
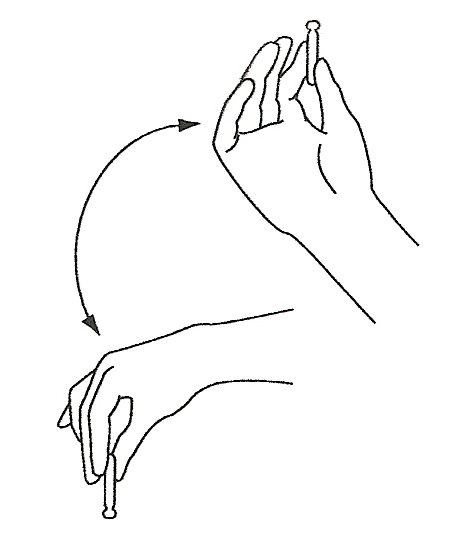
b. Tip 10 Times: Tip the bottle upside down (180 degrees) 10 times; avoid shaking it:

c. Visual Check: Look at the mixture to make sure it is milky white.
3. Draw the cloudy insulin into the syringe with the clear insulin.
You will not get air bubbles this time. If you draw too much cloudy, throw out the entire dose and start again.
4. Give the insulin dose right after preparing it.
B. Drawing from Insulin Vials
1. Start by injecting air into the vial of Cloudy insulin, making it easier to draw the insulin out of the vial later:
a. Draw air into the syringe equal to the number of units of cloudy needed.
b. With the vial standing upright, insert the needle through the top of the cloudy vial and push the plunger down to inject the air into the vial.
c. Remove the needle without drawing any cloudy insulin into the syringe.
2. Then inject air into the vial of clear insulin:
a. Draw air into the syringe equal to the number of units of clear insulin needed.
b. With the vial standing upright, insert the needle through the top of the clear vial and push the plunger down to inject the air into the vial.
3. Draw the correct dose of clear insulin.
a. Hold the vial and syringe upside down. Slowly pull the plunger to draw the correct amount of clear insulin. If there are air bubbles, tap the syringe and/or push the entire dose back into the vial until all air bubbles are gone.
b. Check that you have the correct dose of clear insulin. Remove needle from the vial.
4. Mix the cloudy insulin very well:
a. Roll the bottle between the palms of your hands 10 times
b. Tip the bottle upside down (180 degrees) 10 times; avoid shaking it:
c. Look at the mixture to make sure it is milky white.
5. Insert the needle into the cloudy insulin vial and turn it upside down
6. Draw the cloudy insulin into the syringe with the clear insulin. You will not get air bubbles this time. If you draw too much cloudy, throw out the entire dose and start again.
7. Give the insulin dose right after preparing it.
SHARE THIS
Next steps:
References:
The above information was significantly modified with permission from The Alberta Children’s Hospital Diabetes Clinic information handouts.
FIT injection guidelines, the most recent recommendations regarding injection technique. To access the full document, see FIT Forum for Injection Technique Canada: Recommendations for Best Practice in Injection Technique.
The above information was reviewed for content accuracy by clinical staff of the Alberta Children’s Hospital Diabetes Clinic.